There are plenty of great ways to cook a steak, but one of my favorite method is the reverse sear. The reverse sear method is when you cook a steak at a low temperature in the oven, or smoker, until it reaches just below rare, then finish it by searing it or grilling it. The reverse sear method is particularly popular for thicker cuts of steak, as it helps prevent overcooking the outer layers while ensuring the center is cooked to the desired level of doneness. It’s a great way to achieve a consistent and evenly cooked steak with a beautifully seared crust.
Benefits of the Reverse Sear Method of Cooking:
- Even Doneness: By starting with a low-temperature cooking phase in the oven, the steak cooks more evenly from edge to center. This results in a steak that is less likely to have a significant temperature gradient between the exterior and interior, reducing the risk of overcooking or undercooking.
- Better Control: The reverse sear method allows for better control over the cooking process. You can monitor the internal temperature of the steak more accurately using a probe thermometer, ensuring that the steak reaches your desired level of doneness. You are way less likely to overcook the steak using this method!
- Tender Texture: The slow and gentle cooking during the initial phase helps break down collagen and connective tissues in the meat, resulting in a more tender texture. This is particularly beneficial for tougher cuts of meat, such as ribeye or sirloin.
- Reduced Risk of Overcooking: Since the steak is brought to the desired internal temperature gradually, there is a lower risk of overcooking. This is especially important for achieving the perfect doneness level, whether it’s medium-rare, medium, or well-done.
- Juicier Steak: The reverse sear method allows the juices within the steak to redistribute more evenly during the resting period. This helps retain moisture, resulting in a juicier and more succulent steak.
- Enhanced Flavor: The slower cooking process gives the steak more time to develop flavor as it cooks. This can result in a richer and more developed taste.
- Versatility: The reverse sear method is versatile and can be used for various cuts of steak, including thicker cuts. It can also be adapted for use on a grill, stovetop, or oven.
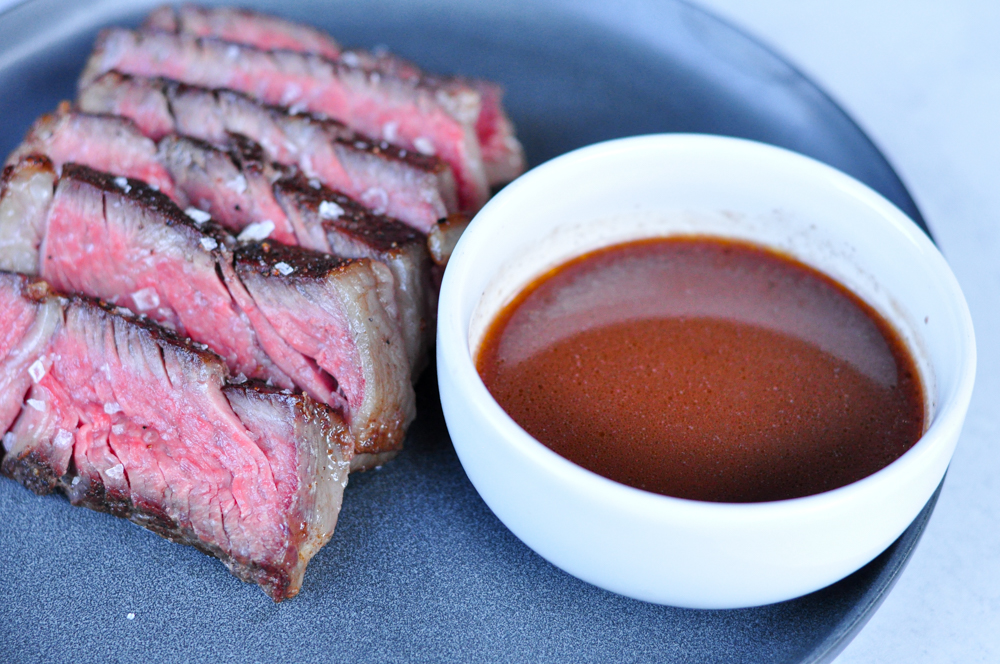
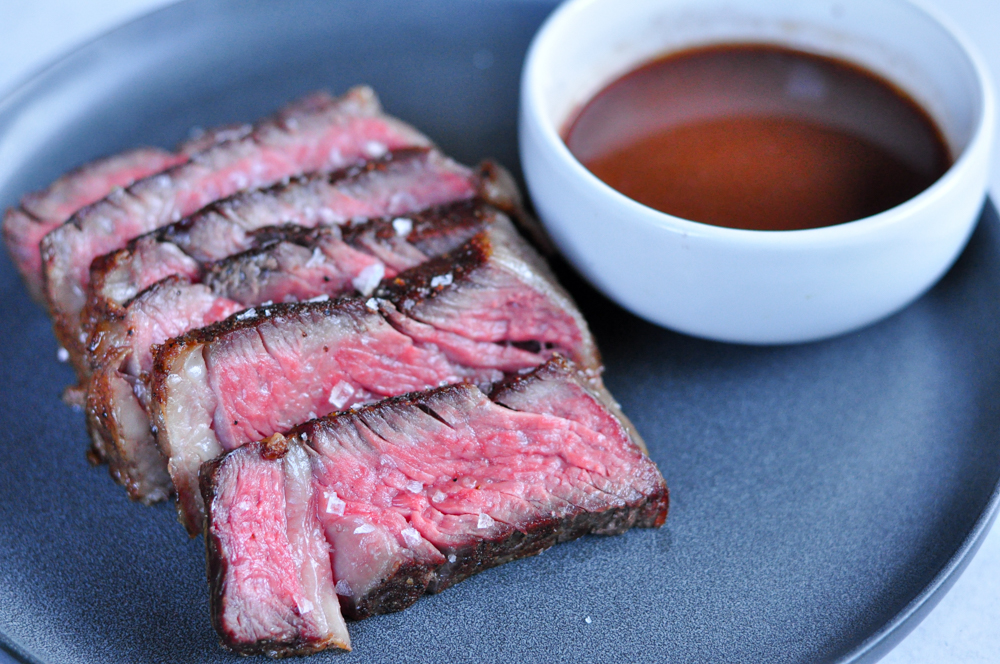
- Presentation: The reverse sear method often produces a steak with a beautiful gradient from edge to center, showcasing a range of doneness levels.
Steps to the Reverse Sear:
- Season the steak. Coat heavily in salt and pepper on both sides, I like to do this a day before to really make sure the salt penetrates the surface to flavor the meat.
- Insert with a heat proof meat thermometer.
- Cook on a wire wrack in a low temp oven or smoker.
- Cook until just under rare – around 115*F.
- Heat a cast iron or grill to medium high and sear on all sides just until golden brown.
- Rest for 10 minutes before slicing and serving.
-
SERVINGS: 2
- PREP TIME: 10 Mins
- COOK TIME: 1 Hr
- TOTAL TIME: 1 Hr 20 Min
This recipe is great with fondant potatoes or pommes puree!
Ingredients:
- 1, 2 to 3 inch ribeye, roughly 1 lb
- salt and pepper
- avocado oil
- 2 tbsp butter
- 3 garlic cloves, crushed
- 1 sprig rosemary
Sauce Ingredients:
- 1 tbsp butter
- 1 shallot, minced
- 1/2 cup dry red wine
- 1/2 cup beef stock
- salt and pepper
Preparation:
STEP 1.
Season the steak with salt and pepper all over. Do this up to 24 hours in advance.
STEP 2.
Preheat the oven to 225*F. Place the steak on a wire wrack over a sheet tray and insert with an oven safe meat thermometer into the thickest part of the steak. Place in the oven and roast until the internal meat thermometer registers 115*F for the steak. This took around 1 hour for my steak, but will range. Remove from the oven and remove the probe.
STEP 3.
Heat a cast iron pan to medium high heat and add avocado oil. Sear the ribeye on all sides until golden, around 1-2 minutes per side, until the last side. On the last side, decrease the heat to low and add butter, garlic and the herbs and baste the steak with the butter for 2 minutes. Remove the steak from the pan and rest.
STEP 4.
In the pan that you just cooked your steak in (or a new pan if you aren’t cooking with steak), turn the heat to medium and add the butter. Once melted add the shallots and saute until translucent, salting as you go, around 2-3 minutes.
STEP 5.
Once the shallots are cooked through, deglaze the pan with the red wine, scraping up any bits stuck to the pan. Reduce the wine by half.
STEP 6.
Add the stock and reduce until it is nappe, or very thick, thick enough to stick to the back of a spoon.
Step 7.
Strain it through a fine mesh strainer and serve with the steak.

Leave A Comment